

This is the third post in a series on WordPress security. The story starts when my site was hacked and continued as I diagnosed the hack. In this post I’ll get into how I identified and then cleaned up the malicious code on my site.  I’ve never done this before yet I found no good resources on this topic so hopefully this information is useful to those that need to clean up their WordPress site after a hack.
If you have better advice, please add it in the comments; I’m looking to provide the best advice possible.
First of all, let’s get it out of the way.  Best practices say the only way to be sure you have a clean site is to do a full reinstall of the site. That requires a fresh install of WordPress, your theme, your plugins, any other software you use AND your WordPress database. I learned this after my site was cleaned  so the advice didn’t help me. Not to mention, starting all over and hoping my site will work once you piece it all back together is pretty frightening.  With that said my host, Dreamhost, provided guidance and security scans to let me know how my clean up was progressing. If you don’t have a host that can provide help, you’re wise to consider reinstalling or finding a WordPress expert to clean up your site for you.
1. Upgrade, reinstall and remove
In the first post in this series I mentioned that I restored my WordPress site from backups. In my case, I had to do that to get access to the WP admin login. Once your site is running again, you still need to upgrade WordPress and reinstall essential plugins.  Notice that plugins need to be reinstalled not just upgraded. Upgrading WordPress is too trivial to describe, just click the “upgrade WordPress” button.
With your WordPress updated turn your attention to your plugins. Take screen shots of your installed plugins as well as those plugins that have settings. Â The settings should be stored in your database, but I liked having a record of everything before proceeding. With a list of all your plugins, use the administrative console to deactivate and delete all your plugins. Â Then reinstall your essential plugins.
In my case, my themes were infected and new malicious themes were installed.  I removed every theme not in use.
2. Â Identify malicious code
Now it’s time to understand how extensively your site has been hacked. Dreamhost was good enough to provide a listing of hacked files. I had over 2,700 infected files on my server.
[error] I had over 2,700 infected files on my server. [/error]
I used this output to carefully clean up my site. Â Knowing what was infected was crucial. Had I not have known I would have been stuck and been forced to reinstall WordPress, which I’m told works, but seems scary.
3. Â Remove unnecessary code
Next, any infected files that you aren’t in use. This will include themes and older versions of your site. Infected themes could be default, those I installed or installed by the hack. I was able to remove the bogus directories with the “rm” command.
cd //wp-content/themes
rm -r bogustheme1 bogustheme2
Working off the list of infected files, I kept a log of files I was removing. Â Just keep ticking your way down the list. You’ll likely find that removing unnecessary directories will go a long way in cleaning up your site.
4. Manually remove PHP
After removing the directories you don’t need, you need to go in and surgically remove the infected php files.  By this point, the number of infected files remaining should be in the dozens, not thousands. For the remaining files you can manually remove the infection. My infected php files had base64 code at the top of the file. It was easy to remove since it was actually one long line.  I used the universal Unix file editor “vi” to edit the files. “vi” is a weird program and insufferable to get accustomed to.  You may have better luck with the tools provided by your hosting company.
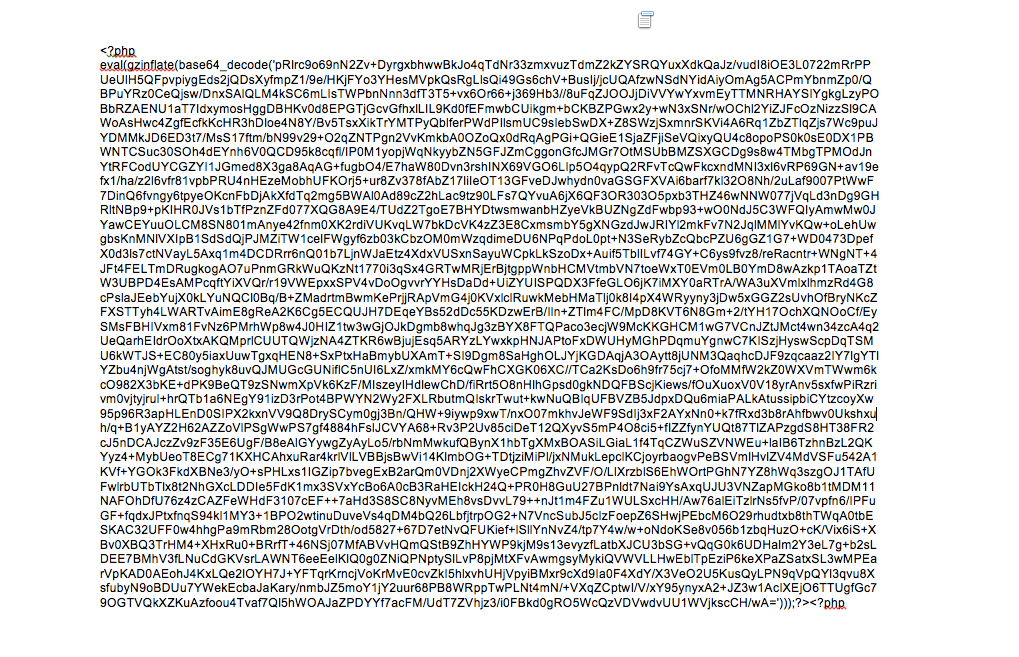
A php infected php file will contain such code
If you’re tech savvy, you can create a webpage on your WordPress site that will allow you to find all the “base64” files on your site by using these instructions.
Hopefully you site is now clean. The next post will discuss lessons learned from this awful experience.
[important]If you have ideas on how to clean up a hacked WordPress site, offer them in the comments.[/important]
Photo credit: Flickr